Check the actuation of the side clamp rollers
WHAT YOU NEED
Tools:Security Torx Key SetAllen Key SetPen
Safety Equipment:Standard Personal Protective Equipment
- Isolate the saw electrically and pneumatically.
- Remove both feeder transparent covers.
- Inspect the rodless cylinders on both feeders for any signs of damage or wear.
- Try to move the side clamp rollers side to side (towards and away from the saw chamber) and make sure there is no play.
-
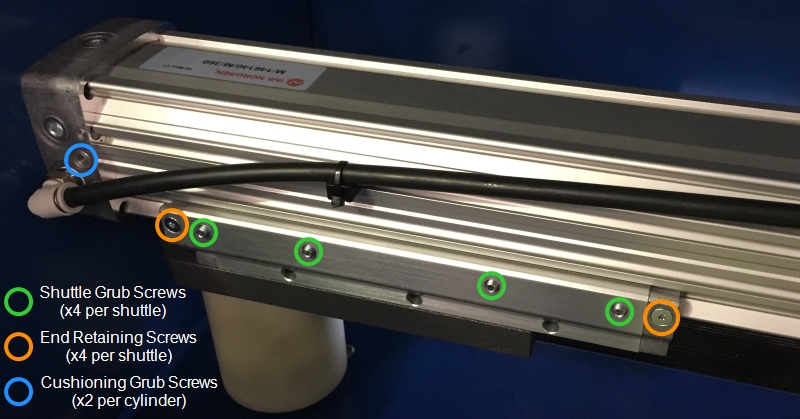
If required, tighten the four grub screws on the internal side of each side clamp roller shuttle to remove any side-to-side play.

Note: do not overtighten the grub screws as this could prevent the shuttles from sliding freely.
- Move the side clamp rollers back and forth by hand and make sure the shuttles slide freely and smoothly.
- Make sure the four end retaining screws on each shuttle are secure so that the nylon wear strips cannot fall out.
- Turn on the pneumatic isolation switch on the pneumatic unit.
- Remove both rear side feeder guards.
- From the rear of each feeder, use a pen to operate the manual override button for the side clamp air supply valve (marked "SIDE") on the valve bank multiple times and observe the actuation of the side clamp rollers.
- Check for smooth movement and correct cushioning.
- If required, adjust the cushioning grub screw at both ends of each rodless cylinder.
- Refit both rear side feeder guards.
- Refit both feeder transparent covers.
- Turn on the electrical isolation switch on the front of the saw.